
This poor thing belongs to a friend. I want to see if I can repair it. As you can see, it has been “repaired” previously with strapping tape. Strapping tape is evil.


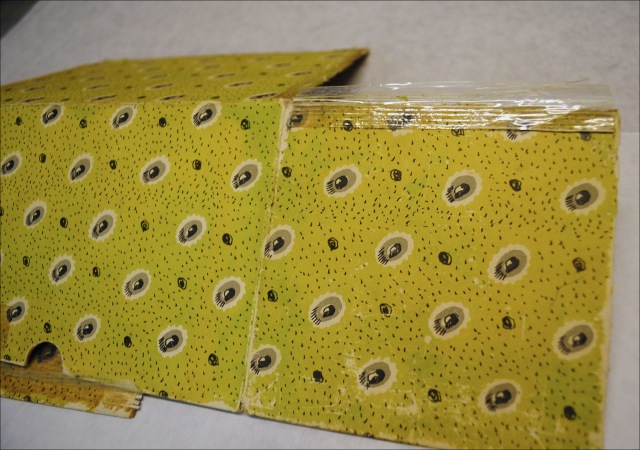
The plastic layer of tape lifted off easily, as did the reinforcing fiber bundles. The adhesive had soaked into the paper, though, and left it stained and sticky.

Copious amounts of acetone, to my surprise, removed most of the adhesive and stain. Removal of the dark stain revealed a few losses to the cover paper along the edges.


I matched the cleaned slipcase pieces against some Japanese tissue to find the best color match. The first was too dark, the second a bit too green.I tinted the greener of the papers with dilute yellow oxide acrylic paint.


Before going any further, I flattened out one bent, delaminating corner.

Scalpel time. The printed cover paper must be lifted up from the board, so that a strip of the tinted Japanese tissue can be inserted below it. This way, the repair paper doesn’t cover up any of the decorated paper on top.


I glued the sides back together to re-form the slipcase, using the Japanese tissue to connect the different pieces together. Again, the repair paper went under the decorated paper. I was able to remove a hidden strip of the original cover paper from under the top layer, and use fragments of it to fill in missing pieces.


This seemed like a good time to also apply reinforcing Japanese paper to the inner joints. This time I had a heavy paper that was a good color match, so I didn’t need to tint it.

Next I mixed up some heavy acrylic paint to match the cover. The color of the cover actually varies, with some greener areas and some more yellow areas, so I went for a color that would harmonize with both. I colored all the exposed repair paper, which adds strength, as well as the larger worn/missing areas. A few white and gray areas also needed inpainting. Once that dried, I added dots and missing details with permanent black ink.


Once all had cured for a bit, I applied a microcrystalline wax to the outside surface to protect the fragile paper from friction wear. The wax also helps the repair tissue to blend in with the original materials. And here it is.


I left the images fairly large, so if you are curious you can inspect the work in detail and find all the imperfections. Hey, they don’t call it “practicing a craft” for nothing. A whole lot of practice is still to come before I can begin to think of mastery of the craft. And if it’s all as much fun as this, I’ll never work a day in my life.

Enjoyed your process and the outcome – wow- thanks for sharing this on LIS –
Excellent work
There’s one more photo to add to this series, to be taken in August: all four books reunited in the slipcase, while at the same time I’m reunited with you, dear Karen. This series of steps blows me away!